Tuesday 31 March 2015

Calculating the Disk Queue Legnth for VM's

Disk queue lengths should not exceed 2 (per disk), alhough if they are sitting behind a RAID array (whether that be an array connected to an onboard HBA or connected through iSCSI) you should take into account the amount of disks and there role in the array - for example:

A RAID 5 array might be setup with 3 disks - with parity being spread accross all disks - but data is striped accross all disks and hence they are all considered data holders. This means when a VM is hosted on a disk configured on this array we must multiply the limit for one disk (2) against the number of disks in the array (3) - hence are acceptable disk queue threshold is 6 (2 * 3)

It is also important to take into account the I/O speeds you are getting from your disks with a tool such as FIO.

Using WinRM to query remote computers

Firstly we must configure WinRM on the remote server with:
winrm quickconfig

We can then initiate a test connection too the server:
winrm get winrm/config/client -r:remote-host -u:user@domain.com -p:password

** Note: If you attempt to connect via WinRM you must make sure that your user account (on the remote computer) is a member of the machine you are connecting to's Local Administrators group otherwise you will get an Access Denied message returned. **

We can then use winrm to query information from the remote computer e.g. services:
winrm get wmicimv2/Win32_Service?Name=spooler

Viewing Dell server hardware information and diagnostics

Dell provides "OpenManage Server Administation" software that can be installed on the server to manage the following:

- DRAC Setup / Status
- BIOS Settings
- Motherboard Information / Configuration
- Network / Port Configurations
- Server Monitors (Such as temperature, power failuire and so on.)
- Storage Setup e.g. Storage Controller Status, RAID Setup and so on.
- Operating System Information

It can be downloaded from:
http://en.community.dell.com/techcenter/systems-management/w/wiki/1760.openmanage-server-administrator-omsa

Working with SSL Certificates using openssl

We can download all of the certificates in a chain from a specified host (this outputs the certificates in PEM format):
openssl s_client -showcerts -connect domain.com:443

We can also verify a certificate chain as follows:
openssl verify -CAfile RootCert.pem -untrusted Intermediate.pem UserCert.pem

We can check a certificae with:
openssl x509 -in cert.pem -text -noout

Convert a DER file (.crt .cer .der) to PEM:
openssl x509 -inform der -in certificate.cer -out certificate.pem

Convert a PEM file to DER:
openssl x509 -outform der -in certificate.pem -out certificate.der

Create a private key and CSR for signing by a CA:
openssl req -new -newkey rsa:2048 -nodes -keyout your domain name.key -out your domain name.csr

Monday 30 March 2015

Monitoring Performance in Exchange 2013

Exchange by default creates a daily performance monitor report in the followin location: C:\Program Files\Microsoft\Exchange Server\V15\Logging\Diagnostics\DailyPerformanceLogs

The recource monitor is also very good for a quick health check of system resource usage, and finally performance monitor will help you build an overview of the performance over a pre-defined period:

All sampling inervals are set to 5 seconds.

Average Client RPC Latency:
MSExchangeIS Client Type\RPC Average Latency (Scale 1000)
Reccomended Value: 50ms

Memory\Available Mbytes (MB):
Reccomended Value (50MB Free)

Memory\Pages/sec
Recommended Value: (no more than 1000)

Memory\Pool Nonpaged Bytes (Scale 10000)
Recommended Value: (no more than 100MB)

Memory\Pool Paged Bytes (Scale 10000)
Recommended Value: (no more than 200MB)

Queues should also be monitored / checked:
Get-Queue | Format-List

Disk Queue Lengths

Please see here for more informaion on working out queue lengths.

MSExchangeTransport Queues\Active Mailbox Delivery Queue Legnth
Recommended Value: (variable)
Description: Active Mailbox Delivery Queue Length is the number of items in the active mailbox queues. This alert indicates that more than 250 messages have been in the Active Mailbox Delivery Queue for more than 5 minutes.

MSExchangeTransport Queues\External Active Remote Delivery Queue Legnth
Indicates the queue count of external mail items (i.e. going to the internet) waiting to be sent on the transport server.

MSExchange RpcClientAccess\RPC Requests
(Should be below 70.)

Processor\Processor Time % (Should be below 75%)

Process\Privilaged Time % (Should be below 75%)
Description: The percentage of time a process was running in privileged mode.

Process\User Time % (Should be below 75%)
Description:  The percentage of time a process was running in user mode.

Network Adapter\Bytes Sent/sec
Network Adapter\Bytes Recieved/sec
Network Adapter\Bytes Total/sec

Microsoft Azure and public IP reservation woes

By default Azure does not assign perminent public IP addresses - when the Stop-VM cmdlet / shutdown is invoked the VM looses it's public IP address, in order to work around this we can either use CNAME records (although this won't work for the root domain as CNAME records can't be applied to for example test.com - only subdomain.domain.com) or we can make use of a "Reserved IP" provided by Azure.


New-AzureReservedIP –ReservedIPName “MyReservedIP” –Label "ReservedLabel" –Location "North Europe"

Get-AzureReservedIP

Thrustratingly you can't assign the reserved IP address to an existing cloud service - which means we have to delete the virtual machine (retaining the disks!) and then re-create it with the following command - making sure we specify the old VM disk:

New-AzureVMConfig -Name <vm-name> -InstanceSize Medium -DiskName <exiting-disk-name> | Add-AzureEndpoint -Name "Remote Desktop" -Protocol "tcp" -PublicPort 3389 -LocalPort 3389 | Set-AzureSubnet <subnet-name> | New-AzureVM -ServiceName <cloud-service-name> -ReservedIPName <reserved-ip- name> -Location "North Europe" -VNetName <virtual-network-name>

or if you want to create a new VM (we use the "ImageName" oposed to "VMImageName" switch:

New-AzureQuickVM -Windows -ServiceName <cloud-service-name> -Name <vm-name> -InstanceSize Medium -VMImageName <vm-template> -AdminUsername admin -Password <password> –ReservedIPName <reseved-ip-name> –Location "North Europe"

During the process I encountered the following error:
"CurrentStorageAccountName is not accessible. Ensure the current storage account is accessible..."

This happend as I had not registered by storage account with Azure Powershell! If we do a Get-AzureSubscription - we notice that the CurrentStorageAccountName is blank! To register this we do the following:

Set-AzureSubscription -SubscriptionName "Free Trial" -CurrentStorageAccountName (Get-AzureStorageAccount).Label -PassThru

** Note: The reserved IP must reside in the same region as the vitual machine (e.g. in this case North Europe.) **

If you wish to remove a reserved IP:
Remove-AzureReservedIP -ReservedIPName "MY-IP-NAME"

Sunday 29 March 2015

Distribution and Dynamic Distribution Groups in Exchange 2013

We can create a distribution group of direct relation to an OU:
New-DistributionGroup -Name "Distribution Group 1" -OrganizationalUnit "domain.com/Users" -SamAccountName "Managers" -Type "Security" -

PrimarySmtpAddress <email-address>

Or we can manually add our own selection:
New-DistributionGroup -Name "Distribution Group 2" -IgnoreNamingPolicy -PrimarySmtpAddress <email-address>

We can then add additional users:
Add-DistributionGroupMember "Distribution Group 2" -Member <Identity> -BypassSecurityGroupManagerCheck

or remove a user:

Remove-DistributionGroupMember "Distribution Group 2" -Member <Identity> -BypassSecurityGroupManagerCheck

By default a distribution group will not be accessible to senders outside of your organization (i.e. internet users) and hence we can enable this if needed:

Set-DistributionGroup "Distribution Group 2" -RequireSenderAuthenticationEnabled $False

We can assign a specific user management permissions on the group:
Set-DistributionGroup -Identity "Distribution Group 2" –ManagedBy <Identity> -BypassSecurityGroupManagerCheck

Dynamic Distribution Groups are groups that when accessed query active directory mail-enabled objects and builds it's membership from the

results of the query - they are dynamically updated every time they are used. Variables such as ConditionalCompany, ConditionalDepartment and so on can be used to build the query.

In environments where there are multiple mailbox servers, a specific mailbox will be delgated the task of receiving the request to service

the distribution group mailbox - this server will then resolve and route to all mailoxes within the distribution group accordingly.

We can identify which expansion server a distribution group uses - although not by default Exchange does not use one, nor require one to function:
Get-DistributionGroup "Distribution Group 2" | FL

Saturday 28 March 2015

Failover or switchover to another mailbox database copy in a DAG for maintainence / DR


In this scenario I wanted to re-created a scenario where a mailbox database has been dismounted due to corruption, user error or whatever and let the other (passive) DAG member replicating the mailbox take over (become the active copy.)

There are two types for recovering mailbox databases within DAGs:

- Failover: An automatic process that switches the active database when it detects the current active database has failed.

- Switchover: A process that is manually invoked by the administrator changing the active mailbox database copy (usually in per-determined / scheduled situations e.g. maintenance / backups)

In my environment I have a mailbox database that is replicated as part of a two node DAG, I will forcefully dismount the active copy of the database:

Dismount-Database -Identity "MailboxDatabase1"

Doing this (not unexpectedly!) results in any Outlook clients that have a mailbox situated on the affected DB to return messages such as "Trying to connect..." and finally Outlook will give up and return a "Disconnected" state. We want to change / move the active mailbox database so we can get our users back up and running again - the dismounting process (because manually invoked) does not perform a failover (automatic) so we will use the Move-ActiveMailboxDatabase cmdlet to perform a swithover (manual):

Move-ActiveMailboxDatabase <mailbox-database> -ActivateOnServer <mailbox-server> -MountDialOverride:None

** Note: For the above procedure to work correctly the target database must be in a "Healthy" state. **

Since I had not gracefully dismounted the mailbox database the Content Indexing did not finish on the target server and hence the Content Index State returned a "Failed" state - due to this I received the following error:

An Active Manager operation failed. Error: The database action failed. Error: An error occurred while trying to validate the specified database copy for possible activation. Error: Database copy <mailbox-database> on server <server-name> has content index catalog files in the following state: 'Failed'. If you need to activate this database copy, you can use the Move-ActiveMailboxDatabase cmdlet with the -SkipClientExperienceChecks parameter to forcibly activate the database.

Move-ActiveMailboxDatabase <mailbox-database> -ActivateOnServer <mailbox-server> -MountDialOverride:None -SkipClientExperienceChecks

Repairing the state with Update-MailboxDatabaseCopy "DB Name\Server Name" -CatalogOnly will not work as we do not have access to the database on the other server! So we will use the -SkipClientExperienceChecks switch:

Move-ActiveMailboxDatabase <mailbox-database> -ActivateOnServer <mailbox-server> -MountDialOverride:None -SkipClientExperienceChecks

We will then have to mount the database:

Mount-Database <mailbox-database>

The Content Indexing will begin (since this is now the Active copy) and repair itself automatically.

We can verify that the DAG member is now holding the active copy of the database:

Get-MailboxDatabaseCopyStatus -Identity <MailboxDatabase> | FL *ActiveDatabaseCopy*

We can also get Exchange to perform an automatic failover by imitating a database failure by killing the store worker threads by simply stopping the Microsoft Exchange Information Store service:

sc stop MSExchangeIS

Finally verify that Outlook is now connected successfully and we can also make sure that the appropriate CAS is being used with:

Get-MailboxDatabase |fl Identity, RpcClientAccessServer

Friday 27 March 2015

Understanding IMCEA and IMCEAEX Encapsulation

When sending an email initially Outlook will lookup the sender and recipient against the global address list (GAL.) If the recipient can't be found it is encapsulated with IMCEA (Internet Mail Connector Encapsulated Addressing) like follows:

IMCEAEX-_O=CONTOSO_OU=First+20Administrative+20Group_cn=Recipients_cn=user@domain.com

The domain (domain.com) taken from the GAL object unless the lookup failed; in that case the forest DN is used.

If you see IMCEAEX (with the addition of EX appended) it means that the address that is encapsulated is not an SMTP address.

You can search for IMCEAEX events in the mail flow logs with powershell:
Get-TransportService | Get-MessageTrackinglog -EventID FAIL -Start (Get-Date).AddDays(-5) -ResultSize Unlimited | Where {$_.Recipients -match "^IMCEAEX*"} | FL

You can decapsulate the addresses by doing the following:

We can convert the unicode characters in the string to human readable format - so for example to extract the address from the following string:

{IMCEAEX-_o=org_ou=Exchange+20Administrative+20Group_cn=Recipients_cn=Joe+20Bloggs@domain.com}{[{LRT=};{LED=550 5.1.1 RESOLVER.ADR.ExRecipNotFound; not found};{FQDN=};{IP=}]}

will be converted to identify all of the unicode characters
We append U+00 to +20, so it becomes U+0020 (which is a space)
and so on...

o=org_ou=Exchange Administrative Group_cn=Recipients_cn=Joe Bloggs@domain.com

There is also a very good MSDN article here (https://msdn.microsoft.com/en-us/library/gg709715%28v=exchg.80%29.aspx) that explains this process in more detail.

Thursday 26 March 2015

ROUTING FAILED: {[{LRT=};{LED=550 5.1.1 RESOLVER.ADR.ExRecipNotFound; not found};{FQDN=};{IP=}]}

I came across this error after recently migrating a user mailbox - I was told by the user that they had sent an email to another couple of users and one specific user did not receive the email. What added to the perplexity of the situation was that there was no NDR generated by Exchange to the sender either.

So I decided to hit up the mail logs with Get-MessagingTrackingLog:
Get-MessageTrackingLog -Server MS02 -Start "03/26/2015 06:00:00" -End "03/26/2015 08:00:00" -Sender "user@domain.com"  -MessageSubject "Your subject title" | FL

and was interested to find out that there was a ROUTE event that had a status of 'FAIL':

In the end it was only by chance I stumbled upon the issue - it was in fact that when a user is migrated (even from one mailbox to another to another environment / domain) there X400 address changes - the problem lies in the fact that this X400 (or X500, X800) data is held within a users NK2 data and because it does not automatically update with the new X400 address (coupled with the fact that Outlook uses the X400 address to route mail by default - not the SMTP address!) the mail was being sent to the users old x400 address!

In order to resolve this you can manually modify all of the end user's NK2 files (yikes) or alternatively add the old x400 address under the mailbox properties. In order to do the latter you will firslty need to get hold of the old X400 address - fortunately when you migrate a mailbox from one DB to another the original DB retains the mailbox (for 30 days by default) in a disconnected state - so we need to run the following command on the mailbox database with the original (now disconnected) mailbox on:

or if you have access to the original mailbox still you can use:

Get-Mailbox <user-mailbox> | fl LegacyExchangeDN

I have also encountered this issue where the migration process has stripped the X400 address from the mailboxes email addresses.

We finally add the additional X400 (or X500, X800) address to the user's email addresses in ECP > Recipients > Properties > Email Addresses > Add.

The X400 (or X500, X800) address should look something like:
/o=org/ou=Exchange Administrative Group/cn=Recipients/cn=Joe Bloggs

Fatal error TooManyMissingItemsPermanentException has occurred.

This error occurs when there are too many bad items encountered during a mailbox migration. By default the "BadItemLimit" is set too 0 - which means that if ANY corrupted items are found during the migration it will fail.

In order to circumvent this we can specify the "BadItemLimit" switch along with the New-MoveRequest command:

New-MoveRequest -Identity <user-mailbox> -TargetDatabase <mailbox-database> -BadItemLimit 100

Monitoring and debugging Outlook Web Access with IIS

We need to ensure that logging is enabled in IIS for the virtual directory (owa by default).

Typically the logs will be kept in:
%SystemDrive%\inetpub\logs\LogFiles

We will use a utility called "Log Parser" by Microsoft that will help us present the logs in a human readable format:
http://www.microsoft.com/en-gb/download/details.aspx?id=24659

Within the log folder you will find a number of folders in the following fashion:

W3SVCX

(Where X is equal to the website number in IIS)

"C:\Program Files (x86)\Log Parser 2.2\logparser.exe" -i:iisw3c -o:csv "select * into c:\log\merge.log from "C:\inetpub\logs\LogFiles\W3SVC1\u_xxxxxxxx.log"

To extract OWA logs we can use the following:

"C:\Program Files (x86)\Log Parser 2.2\LogParser" -i:csv "SELECT cs-username, date, time, c-ip, sc-status, cs-uri-stem, cs(User-Agent) FROM C:\log\merge.log TO C:\log\Output.csv WHERE (cs-method LIKE '%get%' and cs-uri-stem LIKE '%owa%')"

To extract EWS logs we can use the following:
"C:\Program Files (x86)\Log Parser 2.2\LogParser" -i:csv "SELECT cs-username, date, time, c-ip, sc-status, cs-uri-stem, cs(User-Agent) FROM C:\log\merge.log TO C:\log\Output.csv WHERE (cs-method LIKE '%post%' and cs-uri-stem LIKE '%Microsoft-Server-ActiveSync%')"

Wednesday 25 March 2015

Setting up reverse DNS

All IP addresses have a delegated DNS server that is used to provide the reverse DNS information.

To find ou which DNS server is the authoarative one for your IP you can use nslookup:

nslookup
set type=SOA
8.8.8.8

Will then return the authorative nameserver - we will then need to request an PTR record is added for us (assuming we don't have access to the DNS server!)

For example:
8.8.8.in-addr.arpa. 900    IN    PTR    mailserver.example.com.

Performing an authorative restore

In the event that we need to perform an authorative restore we must firstly stop ADDS of the DC we backed up:

sc stop NTDS

Now perform the restoration of the system state, alhough do not restart after the restore operation completes!

Now open an elevated command prompt and enter:

ntdsutil

activate instance ntds

authoritative restore

restore object <dn>

The above process marks a specific object or subset of objects for an authorative restore.

Now simply either reboot or start ADDS again to propogate the changes:

sc start NTDS

Applying Cumulative Updates to Exchange 2013

Before we perform any updating we must make sure the following pre-equisites are performed:

- Backup Active Directory: To do this we will take a system state backup of the domain controller (with the Schema Master FSMO role on!) and if in the event that something goes wrong we can peform an authorative restore.

To do the backup we can simpl use ntbackup (or use the wizard):
ntbackup backup systemstate /J "AD Backup" /F "F:\ADbackup.bkf"

It is reccomended you make sure that the upgrade is tested in a development environment before attempting the update. This is because if the schema get's bodged you will have to restore your old DC and re-build all of the other DC's - as an authorative restore will not work on the schema!

- We will also require a backup of the Exchange server and its databases.

Make sure the user is a member of the Enterpise Admins and Schema Admins.

Remove any UM Language packs (apart from en-US) e.g. :

Setup.exe /RemoveUmLanguagePack:en-GB

Upon updating, we can then install the language pack again:

http://www.microsoft.com/en-us/download/details.aspx?id=35368

Dependent on your Exchange topology will determine on how you apply the updates.

If your Exchange server is not part of a DAG:

Assuming that you have separated the mailbox and CAS roles you will have a single mailbox server and a separate CAS. If we were to upgrade the mailbox server we

Set-ServerComponentState <mailbox-server> –Component HubTransport –State Draining –Requester Maintenance

We also have the ability to setup a mail re-direct o another mailbox server (if available):
Redirect-Message -Server <mailbox-server> -Target <fqdn-of-the-target-server>

Finally we put the server into maintainence mode:
Set-ServerComponentState <mailbox-server> –Component ServerWideOffline –State InActive –Requester Maintenance

If your Exchange server IS part of a DAG:

You will also need to do the following (but don't put the server into maintaince mode just yet):

Suspend-ClusterNode –Name <mailbox-server> // Which suspends the node within the SAG

Set-MailboxServer <mailbox-server> –DatabaseCopyActivationDisabledAndMoveNow $true // Disable database copy activation

We need to determine the data auto copy activation policy is so we can se it back accordingly after the upgrade:
Get-MailboxServer <mailbox-server> | Select DatabaseCopyAutoActivationPolicy

And now we can set the auto activation policy to "Blocked":
Set-MailboxServer E15MB1 –DatabaseCopyAutoActivationPolicy Blocked

And finally put the server into maintainence mode:
Set-ServerComponentState <mailbox-server> –Component ServerWideOffline –State InActive –Requester Maintenance

Perform your updates and then simply bring the server out of maintainence mode:
Set-ServerComponentState <mailbox-server> –Component ServerWideOffline –State Active –Requester Maintenanc

And if it's part of a DAG you will additional need to reset the settings we modified prior:

Resume-ClusterNode –Name <mailbox-server> // Resume the node in the DAG
Set-MailboxServer <mailbox-server> –DatabaseCopyAutoActivationPolicy Unrestricted
Set-MailboxServer <mailbox-server> –DatabaseCopyActivationDisabledAndMoveNow $false
Set-ServerComponentState <mailbox-server>  –Component HubTransport –State Active –Requester Maintenance

And finally put the server in maintainence mode:
Set-ServerComponentState <mailbox-server> –Component ServerWideOffline –State InActive –Requester Maintenance

And to help the services pickup the changes immideately we can restart the relevent services:
Restart-Service MSExchangeTransport // On the mailbox server
Restart-Service MSExchangeFrontEndTransport // On the CAS

Method for client access server:

We can simpl put the server into maintainence mode:
Set-ServerComponentState <mailbox-server> -Component ServerWideOffline -State InActive -Requester Maintenance

To bring the server out of maintainence mode we can use:
Set-ServerComponentState <server-name> -Component ServerWideOffline -State Active -Requester Maintenance

We must also remember to bring the HubTransport out of draining state!:
Set-ServerComponentState <server-name> -Component HubTransport -State Active -Requester Maintenance

And to help the services pickup the changes immideately we can restart the relevent services:
Restart-Service MSExchangeTransport // On the mailbox server
Restart-Service MSExchangeFrontEndTransport // On the CAS

Debugging ActiveSync for devices having problems accessing Exchange

In order to debug activesync problems with devices such as mobile phones, tablets and so on you will firstly have to enable ActiveSync logging on the user mailbox (as this is not enabled by default):

Set-CasMailbox –ActiveSyncDebugLogging $true –Identity <mailbox-name>

You can then retrieve the logs manually using the Exchange Shell:
Get-ActiveSyncDeviceStatistics –mailbox <mailbox-name> -GetMailboxLog:$true –NotificationEmailAddress <user-email>

The above command grabs the current statistics and activesync log and sends them to a specific email address.

Finally we can turn of activesync debugging:
Set-CasMailbox –ActiveSyncDebugLogging $false –Identity <mailbox-name>

Disabling and enabling user mailboxes and the dangers involved

The term "disabling a mailbox" in Exchange is rather misleading in my opinion - logically speaking I would assume that this kind of action would disable (heh?) the mailbox so that a user is unable to access there mailbox anymore. And to be fair this assumption is correct - although there are some serious gotchas that are important to be aware off.

Using the Disable-Mailbox command you delete the exchange attributies (e.g. assosiated display name, email address(s) and so on.)

Using the Delete-Mailbox command you delete the exchange attribuites AND the Active Directory user account assosiated with the mailbox!

But the main gotcha here is that when a mailbox is disabled or deleted - the mailbox is classed as a "Disconnected Mailbox" - and retained in the exchange mailbox database for 30 days (by default) and is then purged / permentatly deleted - even if the Delete-Mailbox option is used. So be careful if you need to temporary disable a mailbox and make sure you do NOT use the Disable-Mailbox cmdlet and rather:

You can view a list of disconnected inboxes by issuing the following with Exchange Shell:

Get-MailboxDatabase | Get-MailboxStatistics | Where { $_.DisconnectReason -eq "Disabled" } | ft DisplayName,Database,DisconnectDate

You can increase the "deleted mailbox rentation period" by issusing:
Set-MailBoxDatabase -Identity "Mailbox DB 1" -MailBoxRentation 120

If you wish to re-connect a mailbox to a user you can issue the following:

Connect-Mailbox -Identity "Joe Bloggs" -Database "MailboxDatabase1" -User "Joe Bloggs" -ManagedFolderMailboxPolicyAllowed

Finally you can restore the mailbox by issusing (to identify the mailbox you wish to restore):

Get-MailboxStatistics -Database MBD01 | Where { $_.DisconnectReason -eq "Disabled" } | Format-List LegacyDN, DisplayName, MailboxGUID, DisconnectReason

This command will return the LegacyDN, DisplayName, MailboxGUID, and DisconnectReason values so we can identify GUID for the old mailbox in our restore request.

And finally perform the restoration:

New-MailboxRestoreRequest -SourceDatabase "MailboxDatabase1" -SourceStoreMailbox 1d20855f-fd54-4681-98e6-e249f7326ddd -TargetMailbox "user@domain.com"

Adding another users mailbox to Outlook 2013

Firstly we will need to ensure you / an administrator has granted the appropriate mailbox permissions so that you can access the mailbox in the first place.

Once this is in place from Outlook 2013 go to File >> Account Settings:


 Under the email tab select the relevent email accoun and click on the "Change" button:


On the "Change Account" wizard select the "More Settings" button on the bottom left hand corner and then select the "Advanced" tab in the new popup window:


Finally click on the "Add" button and type in the additional inbox you wish to obtain access too.


Message Tracking with Exchange 2013

*Pre-requisites for performing messaging tracking*
- The user must me a member of the following security groups: Organization Management, Records Management and Recipient Management.

You can use message tracking within Exchange to review / follow mail flow by reviewing the generated logs. By default it is enabled - although you can enable or disable using the Exchange Shell as follows:

Set-TransportService <server-name> -MessageTrackingLogPath "C:\Program Files\Microsoft\Exchange Server\V15\TransportRoles\Logs\MessageTracking" -MessageTrackingLogMaxFileSize 10MB -MessageTrackingLogMaxDirectorySize 1GB -MessageTrackingLogMaxAge 30.00:00:00 -MessageTrackingLogSubjectLoggingEnabled $true

You can manually access the log files in the following location:
C:\Program Files\Microsoft\Exchange Server\V15\TransportRoles\Logs\MessageTracking

There are several types of message logs as described below:
MSGTRKMS – For sent messages (messages sent from mailboxes by the Mailbox Transport Submission service).

MSGTRKMD – For received messages. (Messages delivered to mailboxes by the Mailbox Transport Delivery service).

MSGTRK – For mail flow (Transport service events).

MSGTRKMA –  Approvals and rejections used by moderated transport.

Using the shell we can search for emails from these logs - in order to find emails that were sent from a specific email to another email during a specific date range we can use:

Get-MessageTrackingLog -Server Mailbox01 -Start "03/13/2013 09:00:00" -End "03/15/2013 17:00:00" -Sender "john@contoso.com" -Recipients "joe@test.com" -EventId Send -MessageSubject "Test Subject"

The GUI does not provide the same level of functionality as the cli in this instance and as a result I would reccomend you stick with the Exchange Shell.

The following will give you detailed information regarding all of the events during the mailflow.

Get-MessageTrackingLog -Server MS02 -Start "03/26/2015 06:00:00" -End "03/26/2015 08:00:00" -Sender "user@domain.com"  -MessageSubject "Your subject title" | FL

We can also track NDR's
Get-MessageTrackingLog -Server <mailbox-server> -Start "03/26/2015 06:00:00" -End "03/26/2015 17:00:00" -EventID FAIL  -Recipient "user@domain.com"

or track a specific message with the -MessageId switch:

Get-MessageTrackingLog -Server MS02 -Start "04/13/2015 06:00:00" -End "04/13/2015 22:00:00" -MessageId "<message-id>" | FL

For more information please see here (https://technet.microsoft.com/en-us/library/aa997573%28v=exchg.150%29.aspx)

Wildcards

Since the -Sender or -Recipient parameters do not support wildcards e.g. search for all emails from a specific domain - we have to pipe the output out to 'Where-Object' e.g. to find all gmail.com message we could issue

Get-MessageTrackingLog -Start (Get-Date).AddHours(-24) -ResultSize Unlimited | Where-Object {$_.recipients -like "*@gmail.com"}

Tuesday 24 March 2015

Setting up a mailbox database with Exchange 2013

This task can be accomplished either by the Exchange Shell or ECP. There are also some considerations we must take into account when creating a new database:

- Logging Transaction Type: Do we want to enable circular logging? (For consideration when disk space is limited)
- Do we want to house different databases on different partitions / disks (for performance / mitigation of data loss).

We will use the shell to create the database:
New-MailboxDatabase -Identity <mailbox-server> -Name "MailboxDB1" -EdbFilePath D:\ExchangeMailboxes\MailboxDB1.edb -LogFolderPath E:\ExchangeLogs\LogFolder

You will see the following warning afterwards:
"WARNING: Please restart the Microsoft Exchange Information Store service on server MS02 after adding new mailbox
databases."

You should restart this service outside of work hours!

And if needs be enable circular logging:
Set-MailboxDatabase -Identity "Administration" -CircularLoggingEnabled $true

By default the mailbox will not be mounted so we do:
Mount-MailboxDatabase <mailbox-database>

Monday 23 March 2015

Transactional Logging (including Circular Logging)

Transacional logging in Exchange is similar to that of transactional logging in he database world. A transaction log holds a list of all transactions that have gone into a database - whether that be informaion is added, deleted or modified - details such as the user, time and so on are also logged. This prevents users from accessing the database at the same moment and causing any conflicts.

Typically a transaction log can be used to bring a mailbox database up-to-date if for example the mailbox database is restored from a backup - the transactional data can be replayed to the database with a utility such as eseutil. Trasnactional logs are also limited in size (and hence here are often many of them) to help in the event of data corruption (there is less chance of all of the logs corrupting.)

Within the log directory all log files will have a 3 character prefix and contain the .log file extension. There is also a file with a .chk file extension that identifies the most up-to-date transaction log and he database they belong too.

When Exchange mounts a mailbox database it goes through the following process:

- Read the last transaction log property - you can view this yourself by using eseutil /mh switch.

- Check the .chk file in the log directory to make sure what should have been the last log file to consume / read.

- If the .chk file states that the last transaction log is higher than the one that is recorded in the database it will begin replaying he newer transaction logs.

Circular Logging is a feature that is applied in scenerios where disk space is low on the server or where you do no have an Exchange backup utility that is capable of reading the Exchange logs. It fundamentally limits the amount of logs generated, hence keeping disk space usage low - although on a down-side preventing you from perfoming features such "Point in Time" recovery.

Migrating users between mailbox databases in Exchange 2013

Migrating users between mailbox databases in Exchange 2013

Test whether mailbox is suitable to move:
New-MoveRequest -Identity 'user@domain.com' -TargetDatabase DB01 -WhatIf
New-MoveRequest -Identity 'user@domain.com' -TargetDatabase DB01
(also moves any assosiaed archived mailbox)

You can view move request status with either:
Get-MoveRequestStatistics -Identity "user@domain.com" | Format-List
Get-MoveRequestStatistics -MoveRequestQueue <mailbox-server>
You can also view the report data (which is extremely useful when diagnosing migration problems!):

Get-MoveRequestStatistics -Identity "user@domain.com" -includereport | Format-List

You can also resume any failed move request with:
Get-MoveRequest -MoveStatus Failed | Resume-MoveRequest
And to delete a move request:
Remove-MoveRequest -Identity "user@domain.com"
 You can also stop and suspend the migration request respectively:
Stop-MoveRequest -Identity "user@domain.com"
Suspend-MoneRequest -Identity "user@domain.com"
 It is also worth noteing that when a mailbox is migrated from one database to another - it is not actually deleted immiediately and is rather put into a "soft-deleted" state and are not actually purged until the "deleted mailbox rentation" period lapses or the Remove-StoreMailbox command is issued. You can review all of the mailboxes in the "soft-deleted" state by issuing:

Get-MailboxDatabase | Get-MailboxStatistics | Where { $_.DisconnectReason -eq "SoftDeleted" } | ft DisplayName,Database,DisconnectDate

For more information please see here.

Sunday 22 March 2015

Setting up mutual TLS between two autonomous Exchange environments


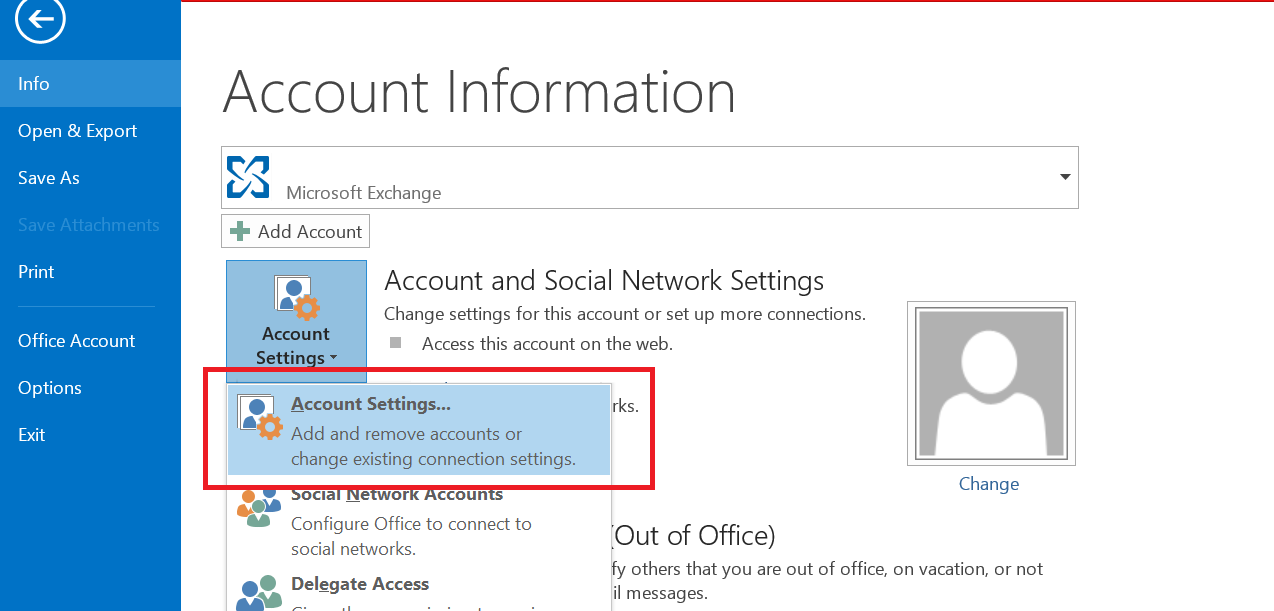
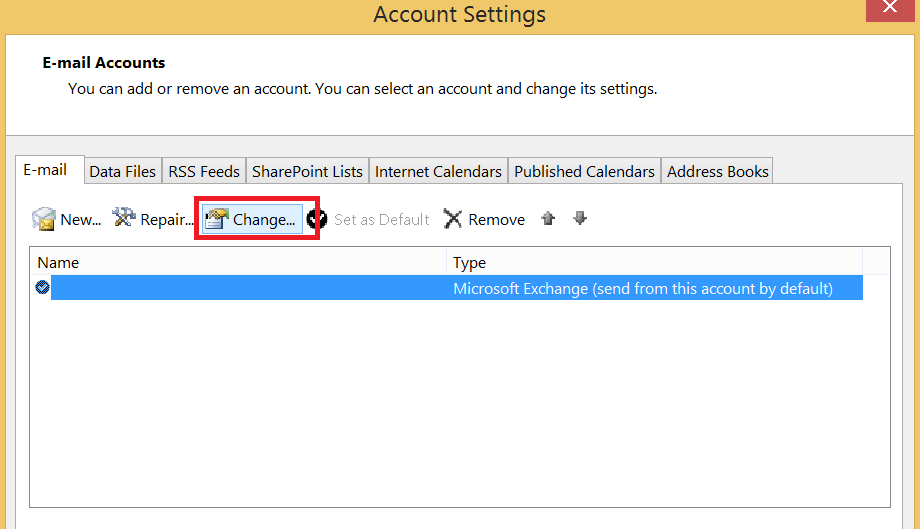
Setting up secure communication between two Exchange environments with TLS
In the example we will have two separate environments that have their own  domains and are not connected in anyway / no trust in place. We have  domaina.com and domainb.com. Each site has a a DC with ADCS installed (DCDomA and DCDomB) and an Exchange server that acts as CAS and Mailbox Server (ExchDomA and ExchDomB), we will firstly need to make sure  both Exchange servers have the other domains CA root certificate installed by importing the root certificate from site A to B (so site B can validate server A) and from site B to site A (so site A can validate server B.)
So we must firstly install a CA on each environment (assuming that you will not be using a public CA) and import the root CA  certificates of each environment into the other using the Certifcates snapin - place the root certificates under “Trusted Root Certificates” on the computer account.
We will use openssl (for production environments - https://slproweb.com/products/Win32OpenSSL.html - DO NOT use GNU32 OpenSSL for Windows as it is packed with bugs!) or http://csrgenerator.com (only if using a lab though!) to create a new certificate request:
*** Note before getting the following command to work with the GNU version of OpenSSL for windows I had to set an enviromental variable as follows:
set OPENSSL_CONF=C:\OpenSSL-Win32\bin\openssl.cfg
***
openssl req -new -newkey rsa:2048 -nodes -keyout server.key -out server.csr 

Submit the request via Certificate Services, apprive the request using the Certificate Authority snapin and then go back to Certificate Services to download the certificate - although make sure that it is downloaded in BASE64 format otherwise openSSL won’t be able to read it! (i.e. The first line of the .cer file should start with: -----BEGIN CERTIFICATE-----) We will now need to create a .pfx (Personal Information Exchange) that will contain our private key and newly generated certificate:
openssl pkcs12 -export -out domain.name.pfx -inkey domain.name.key -in domain.name.crt

I strongly reccomend you stick with openssl for anything related to certificates, private keys etc. (you will save yourself a lot of hassle!)

Or if you don’t have access to a linux environment (or an openssl windows implementaton) you can use the pvk2pfx  and cert2spc utilites provided by Microsoft in the “Microsoft Windows SDK for Windows 7 and .NET Framework” pack (http://www.microsoft.com/en-us/download/details.aspx?id=8279):

We must also firstly convert the private key that OpenSSL generated into a readable format for the pvk2pfx utility - we do this using a tool called pvktool (http://www.drh-consultancy.demon.co.uk/pvk.html):

pvk -in privatekey.key -out privatekey-ms.key -topvk

We also need to convert the .cer file to an spc file with cert2spc:

Cert2spc input.cer output.spc
And now create the pfx file with pvk2pfx:
Again we will now import our pfx file for our exchange server: This can be accomplished via the ECP by going to Servers >> Certificates:

You must also double click on the certificate afterwords and make sure “SMTP” is ticked under the “Services” tab! 
Or you can use the Exchange Shell:
Import-ExchangeCertificate -FileData ([Byte[]]$(Get-Content -Path C:\temp\certroot.pfx -Encoding Byte -ReadCount 0)) | Enable-ExchangeCertificate -Services SMTP
Once the certificates have been installed we will actually hook the two exchange servers on the two sites together.
We will focus on making sure sent mail works between the two sites first so to do this we will create a new Send Connector  and choose the "Internal" connector type and define a smarthost (which will be the IP / hostname of your other Exchange / CAS server on the other site.)
We will select “external secured” - and finally adding an "Address Space" - which simply defines which domains should this send connector be used for.
Now we add a receive connector on the other server, selecting the "Custom" type, specifying the source server etc. We will then go into the new connectors properties and make sure we select “external secured” and "Anonymous Users" check boxes. It is also vital that there are DNS entries present for the partner exchange server it each environments! 
Now we will check and make sure that the message has been sent successfully via querying the Queue Viewer and once we have confirmed receipt we can add our domain security by using TLS.
We need to configure the transport server - instructing the first exchange server to use TLS for recieve and send operatons to the other domain:
Set-TransportConfig -TLSSendDomainSecureList domaina.com // so anyone sending from domaina.com should use TLS
Set-TransportConfig –TLSReceiveDomainSecureList domainb.com // so anyone sending to domaina.com from domainb.com should use TLS.
And we will then do the same (but inverted) on domainb.com:
Set-TransportConfig -TLSSendDomainSecureList domainb.com
Set-TransportConfig –TLSReceiveDomainSecureList domaina.com

We need to modify the send connector we created for domainb.com on domaina.com: and make sure “Proxy through client access server” is checked.
We will now modify the recieve connector on domainb.com and untick “Externally secured” and tick “Transport Layer Security (TLS)” and “Enable domain security (mutual Auth TLS)” and finally make sure only “Partners”, “Anonymous Users” and “Exchange Servers” are ticked in the Permission Groups options:

 
We now need to perform the inverse operation on domainb.com now - I won’t cover this as I have listed all of the procedures above.
Finally if everything goes OK you should have a green tick next to your mail you send between the domains - clicking on this will inform the user that the mail item has been secured and has not been modified in any way :


Saturday 21 March 2015

Automating MSSQL backups

Launch SQL Server Management Studio >> Right-hand click database >> Tasks >> Backup. Set the options e.g. destination and so on and then click on the "Script" icon and select "Script as job..."

Backing up SQL instances from Google SQL Cloud

Firstly select your project:
gcloud config set project <project-id>

gcloud sql instances patch <instance-name> --backup-start-time HH:MM

* Note: The backup time has a four hour start window - meaning that if you schedule the backup for 01:00 - the backup might not start until 05:00. *

How to connect to the Google Compute Engine / Cloud

Firstly we download the Google Cloud SDK installer:
https://cloud.google.com/sdk/

Upon installation, launch the Google Cloud SDK Shell and type the following to authneticate with Google Cloud:
gcloud auth login

We can list all of the projects we currently have:
gcloud preview projects list

We shall set the default project we will be working with:
gcloud config set project <project-id>

We can now return a list of the vm instances:
gcloud compute instances list

Friday 20 March 2015

Changing a send connectors / virtual hosts port

There is currently no way to perform this within ECP - although you can add a smarthost easily enough - you are unable to specify a specific port during defining it. This must be performed with the Exchange Shell:

We will get a list of all send connects to identify the one in question:
Get-SendConnector

And then we can change the port number assosiated with it:
Set-SendConnector -Identity <connector-name> -Port 587

And finally to verify the changes:
Get-SendConnector -Identity <connector-name> | FL *Port*

Unable to send email on a VM provide by Google Compute

If you are wondering why you are unable to send email via a virtual machijne deployed by Google Compute - specifically port 25 / SMTP - it is because Google have chosen to block outbound connections on port 25 from your VM - presumely in a fight to avoid / fight email spam.

Since I wanted to setup an instance of an Exchange CAS in Google's Cloud I was faced with a bit of pain in the backside. I could either proxy the requests through another host or a different platform or send them through a smarthost for delivery (which is actually what Google reccomends on the subject - https://cloud.google.com/compute/docs/tutorials/sending-mail)

I chose the latter option and went with a company called "Mandrill" - which offer a free plan that allows you to send upto 12,000 outbound emails per month (which is more than enough for my needs) and critically lets you connect to the smarthost on port 2525 (which google permits.)

http://mandrillapp.com

Debugging Send and Recieving Email with the Transport Service on Exchange 2013

By default Exchange 2013 enables transport logging for both inbound and outbound mail - including a connectivity log.

In order to identify where these logs are kept we can either use the Exchange Shell:

Get-TransportService | FL *LogPath*

or simply use ECP:

Servers >> <Transport Server> >> Transport Logs

I have listed the default location for each type of log below:

Outbound Mail / Send Connector:
<ExchangeInstallationPath>TransportRoles\Logs\Hub\ProtocolLog\SmtpSend

Inbound Mail / Recieve Connector:
<ExchangeInstallationPath>TransportRoles\Logs\Hub\ProtocolLog\SmtpRecieve

Connectivity Log (For debugging dns, ip, etc. issues):
<ExchangeInstallationPath>\TransportRoles\Logs\Hub\Connectivity

Message Tracking:
<ExchangeInstallationPath>\TransportRoles\Logs\MessageTracking

Wednesday 18 March 2015

Introduction to HP iLO

HP iLO provides remote management for servers and is accessed over a dedicated ethernet port.

Typically a tag is provided with the server with the default username and password. E.g. Administrator Password <random-string-of-characters>

By default DHCP is enabled and hence you will have to provide DHCP reception on the same network segment and then connect via the leased IP address. iLO will also attempt to register its hostname to DNS servers provided.

Centralized Management is available - by using the HP System Management Software Homepage and connecting hosts with the HP Insight Agent. There are also various different licenses available that unlock / provide different functionality e.g. remote control and so on.

If you do not want to use DHCP (or have configured a static IP address and are no longer sure of it) you can connect a crossover cable directly between the iLO port on the server and your computer - which then prompts iLO to configure a default static IP address of 192.168.1.1

In order to upgrade the iLO firmware you should download the relevent firmware for the version of iLO you are using:

- Version 3: http://h20564.www2.hp.com/hpsc/swd/public/detail?sp4ts.oid=4091567&swItemId=MTX_8d5e3a88ef9f4c26a1f5c2c1f2&swEnvOid=4064
- Version 4: http://h20564.www2.hp.com/hpsc/swd/public/readIndex?sp4ts.oid=5228286

You can either use the Windows / Linux installer - or if you prefer to update it via the web API for iLO you can simply extract the executable (as it is a self-extracting package) and find the ".bin" file that can be used to upgrade iLO.

Tuesday 17 March 2015

NETBIOS - What does it do and why do we need it?

NETBIOS is required even on network with a forest / domain level equal to Server 2012 R2 for the following components:

- Joining a computer to the domain.
- Network and Printer Browsing (this is because this feature listens for NETBIOS boradcasts in order to pickup hosts)
- WINS

How RPC Connections are established

All RPC services register a UUID (Universally Unique Identifier) within the registry - which are the consisent globally accross all platforms. When the RPC service initially starts it does not have a pre-determined port number - rather it requests an available RPC port (TCP port 49152-65535 on Windows 2008 and above) and then assigns that port to the UUID.

When a client attempts to connect to a specific RPC service most of time it does not know the respective port number and hence will query the RPC port mapper (on TCP port 135) with the UUID in order to obtain the correct port.

Active Directory Ports - Firewall Considerations

In order to make sure a domain controller works correctly through a firewall you should make sure the following ports are available:

Port 135 / TCP: RPC Endpoint Mapper - allows remote RPC clients to connect to a RPC service.
Port 137 / TCP: Provides NetBIOS reception for NetBIOS clients (for older clients e.g. Windows 2K etc.)
Port 138 / UDP: Provides NetBIOS datagram service.
Port 139 / TCP: NetBIOS session service
49152-65535 / TCP: RPC Dynamic Assignment
445 TCP / UDP: Provides UDP service
389 TCP: Provides LDAP service
3268 / TCP: Provides Global Catalog service
3269 / TCP: Provides Global Catalog service over SSL
88 TCP / UDP: Provides Kerboros service
53 TCP / UDP: Provides DNS service

Condensing RPC Ports to lessen the attack surface:
We can configure the RPC services to use a smaller pool of IP addresses - firstly we will configure AD replication:

Browse to they key: HKEY_LOCAL_MACHINE\SYSTEM\CurrentControlSet\Services\NTDS\Parameters\
Add a new DWORD "TCP/IP Port" and specify a decimal value e.g. 49152.

For FRS (File Replication Service) browse to the key: HKEY_LOCAL_MACHINE\SYSTEM\CurrentControlSet\Services\NTFRS\Parameters\
And we add a new DWORD: "RPC TCP/IP Port Assignment" and set the decimal value e.g. 49153.

For DFSR we can change the RPC port assignements using the dfsrdiag command:
dfsrdiag StaticRPC /port: 49154 /Member: file-server.mydomain.com

Finally we resart the nescasery services:
Active Directory Domain Services
DFS Replication

Monday 16 March 2015

Adding a Bitlocker password protector with Powershell

Firstly we need to alter the local Group Policy:
Local Group Policy > Computer Configuration > Administrative Templates > Windows Components > Bitlocker Drive Encryption > Operating System Drives > Allow enhanced PIN for startup = Enabled and the "Require additional authentication at startup" = Enabled.

You might also want to set "Configure use of passwords for operating system drives" as well to define password a password policy.

Or we will get the following error message when creating the protector:
"Add-PasswordProtectorInternal : Group Policy setings do not permit creation of a password."

$encpass = ConvertTo-SecureString -AsPlainText -String "yourpassword" -Force
Add-BitlockerKeyProtector -MountPoint C:\ -Password $encpass -PasswordProtector

We can also do this the traditional way:
manage-bde -protectors -add c: -password "yourpassword"

Understanding how Named Pipes work

A named pipe provides one or bi-directional communication between a pipe server and pipe clients, as well as having the ability to spawn multiple instances - allowing multiple clients accessing them at the same time.

Typically Windows makes extensive use of them - to name a few:
dnsserver
eventlog
keysvc
ipsec
For a more expansive list please see here.

In order to connect to the named pipe we connect over SMB to the IPC$ share that will then allows us to connect with a named pipe. We will now need to bind to a specific interface on the named pipe and the relevent Operation Number and Operation Name to invoke a call.

For example the 'eventlog' named pipe has a operation name called "ElfrClearELFW" - by using the "ClearEventLog" Windows API you are able to clear the event log.

Named pipes can also be accessed remotely over a network for example:
\\<hostname>\pipe\eventlog

When creating a named pipe (using the CreateNamedPipe function) you also have the ability to set a security descriptor that defines access permissions on the named pipe. Although if this information is ommited / null the default permissions are applied:

Local System = Full Control
Administrators = Full Control
Creator Owner = Full Control
Everyone = Read
Anonymous = Read

You can use the 'GetSecurityInfo' function to get the security discriptor information for the named pipe and use the 'SetSecurityInfo' to set access control permissions.

There is also a nice little utility that can display all of the namedpipes from SysInternals called pipelist

Named Pipes Connection Establishment is achieved by using CIFS or SMB protocol - the following information has to be worked:

- Authentication must be negotiated
- Remote process must be idenified (by using \\<hosname>\IPC$

Once this connection has been negotiated - all further RPC binds and calls are encapsulated with SMB - being sen over port 445 / 139.

Setting up a point to site connection with Azure.

A point to site connection allows you to provide a way for two sites to communicate via a host that acts as a router - oposed to a site to site VPN that allows you to hookup two sites that share the same network space.

To setup a poin to site VPN we go to: Add >> Network Services >> Virtual Network >> Custom Create. Making sure you tick the "Point to site" option on stage 2. Configure the address space, for this example we will use

We will then configure the address space, the subnet for our virtual network (where our VM's from the Azure cloud will reside) and the "gateway subnet" (which is the subnet that will be used for remote VPN devices.)

Go into the newly created VPN and click on "Create Gateway." We will then need to wait around 5 - 10 minutes for the VPN gateway to be created - you can view the status of this by going to he "Dashboard" of the VPN on the "Networks" tab.

Eventually when it has been created - we will go to "Certificates" on the VPN / virtual network settings and upload our Root CA.  Then back on the "Dashboard" under "quick glance" you will be able to download the VPN client.

We will install this on the on-premis host we wish to join to the VPN. Upon finishing installation you should simply be able to join the VPN from the connections view.

Thursday 12 March 2015

Microsoft Azure Networking Basics

Windows Azure (by default) assigns each VM a VIP (Virtual IP) from the Azure DHCP server that has a very long lease time and is retained even when the VM is turned off (although the VM must remain in the "Allocated" state.)

It is not possible to use your own DHCP server in an Azure network, although you can configure DHCP options via the Azure DHCP server.

On the other hand you can have your own DNS server running in your Azure network.

Creating a nework:
In order to create a new network in Azure, go to the "Networks" tab in the Azure Portal - here we have two options:

Virtual Network: Similar to Hyper-V the virtual network / vSwitch is situated within the Azure cloud.

Local Network: This is where you can configure a VPN so you can hook-up one of your local / on-premis networks to the Azure infrastucture.

How to change or add a virtual network to a virtual machine with Azure

A massive annoyance is that you are unable to switch virtual networks around on VMs i.e. you must define the virtual network initially when creating the VM - there is no way of adding or switching this afterwards!

Althoguh there is a hack and slash method to achieve this...
Firstly delete the VM you wish to change / add the virtual network too (although make sure you select "Keep Disks")!

Go to the disks tab and make sure that the disk is still present / not allocated to a VM. (Make sure you DO NOT delete them assosiated "Cloud Service" as well otherwise you won't be able to use the same IP address!)

Then we go to: New >> Computer >> Virtual Machine >> From Gallery >> Disk (select the disk from your old VM - your old disk CAN take upto 10 minutes sometimes to appear in the disk view - so be patient.)

Create the VM as usual - although make sure that you select the relevent Virtual Network under "Region/Affinity group/Virtual network" and also select the same "Cloud Service" that your old VM was using.

The only other drawback (apart from taking some time) to this method is that you lose your RIPE IP address allocation for the cloud service - but this shouldn't be a massive issue if you are using DNS.

Wednesday 11 March 2015

Accessing and Setting up Azure VMs with Remote Desktop

By default when you have created a VM the RDP service is available (internally - I.E. not via the internet) on the standard port of 3389, while externally (i.e. via internet) a random port is assigned for RDP. While this is certainly a security consideration - although might be impractical if you have a strict (and rightly so) firewall policy in your organization.

Now in order to change this we need to configure the VM enpoint settings - from the Azure Management Panel:

Virtual Machines >> Select Virtual Machine >> Enpoints > Remote Desktop >> Edit.

Manually adding a SCOM agent to a non-domain member

Environment: Internal Domain sitting behind a firewall - this internal domain also has a CA we will use for issuing certificates for SCOM - the external server is not a member of the domain and is connecting via the internet.

Firstly we need to create a certificate request via Active Directory Certificate Services on the CA.

Load up ADCS in your web browser and go to "Request a certificate" >> "Advanced Certificate Request".

For the name we will enter the hostname, also replicate this for the "Friendly Name". "Type of Certificate Needed" should be set to "Other" - the OID should be 1.3.6.1.5.5.7.3.1, 1.3.6.1.5.5.7.3.2

We also want to make sure that the "Mak keys as exportable" is checked.

We will then go to the Certificate Auhority mmc snapin >> "Pending Requests" and approve the request we made earlier.

We can now head back to Active Directory Certificate Services >> "View the status of a pending certificate request" and then click on "Install certificate" - this will install it in our the local certificate store for the user within the personal branch. So we will export the certificate from the local certificate store on the CA (along with it's private key!)

We should install the SCOM client:
MMASetup-AMD64.exe
and then import our PFX we exported on the server we wish to add to SCOM. ** The certificate generated MUS be installed with the MOMCertImport utility:
MOMCertImportAMD64.exe my-exported-cert.pfx
We should also import the root certificate to the host that we want to install the SCOM client on - the root certificate can also be requested from Active Directory Certificate Services - although this can simply be imported under the "Local System" certificate store under "Trust Root Certificates".

And then finally restart the SCOM Agent Health Service:
sc stop healthservice
sc start healthservice

Now review the event log and make sure that the SCOM agent is now successfully communicating with the SCOM server.

How to configure and access Azure via PowerShell

Firstly we will install Microsoft Azure Powershell with Microsoft Azure SDK:
http://go.microsoft.com/fwlink/p/?linkid=320376&clcid=0x409

Then we will load Microsoft Azure Powershell and run the following command to download your credentials and other connection information to hook up your powershell with your Azure account:

Get-AzurePublishSettingsFile

We will then download the file that is prompted to us and import it with the following command:

Import-AzurePublishSettingsFile <file-name>

We can then check the active subscripts with the following command:
Get-AzureSubscription

And return a list of our VM's:
Get-AzureVM

How to backup your VM's on Azure with Azure Backup

Currently there is no standardized way of backing up virtual machines (of any OS) without having to power-down the system during the backup. Unless that is that you are running Server 2008 R2 and above - then you can take advantage of Azure Backup.

Azure Backup works by insalling the Azure Backup Client on the VM (utilizing VSS) and backing up the data to a "Backup Vault" in the Azure cloud.

So we will firstly create a "Backup Vault" from the Azure Control Panel:
Data Services >> Recovery Services >> Backup Vault

Then from the Azure Control Panel we will go to "Recover Services" and then double click the backup vaul we created. We can then download the "Vaul Credentials" file and the relevent agent executable.

Run the excutable on the server in question and specify the vault credentials.

We can then run the "Microsoft Azure Backup" application and configure / schedule are backups!

Tuesday 10 March 2015

Accessing and Setting up Azure VMs with Remote Desktop

By default when you have created a VM the RDP service is available (internally - I.E. not via the internet) on the standard port of 3389, while externally (i.e. via internet) a random port is assigned for RDP. While this is certainly a security consideration - although might be impractical if you have a strict (and rightly so) firewall policy in your organization.

Now in order to change this we need to configure the VM enpoint settings - from the Azure Management Panel:

Virtual Machines >> Select Virtual Machine >> Enpoints > Remote Desktop >> Edit.

Understanding BLOB storage in Azure

Since finding out that BLOB storage is the default storage type in Azure for your virtual machines I had a sudden interest to gain a strong understnading of how BLOB storage works.

BLOB stands for "Binary Large Object". From a database stand point a BLOB is typically binary data that does not conform to a common database type (e.g. string, interger and so on...) - an typical example might be an image.

Allows client data to be uploaded in binary format - the binary data (blobs) are stored in what Microsoft refer to as "Containers." Typically a storage account can contain unlimited containers and a container can contain unlimited blobs - as longs as the a block blob does not exceed 200GB and a page blog does not exceed 1TB.

As evident above there are two main types of blobs:
Block Blobs - Block Blobs consist of binary data that has been segmented into "blocks" for ease of transmission over a network. Each block within a blob can be upto 4MB in size and will vary and has it's own unique block ID. This allows blocks to be downloaded separetly / independently and in an asyncronous fashion - but upon completion be re-ordered in the correct sequence.

Page Blocks: Page Blocks as mentioned above can not exceed 1TB and consist of a collection of 512-byte pages. They are actually used for the VHD's for the IaaS (Infrastructure as a Service) VM's.

In order to access block storage Microsoft has provided a API access for a number of well known languages e.g. PHP, JAVA, Python and so on - hence allowing programs to easily access this storage.

It is also accessable via HTTP as follows:
http://<your-storage-account-name>/blob.core.windows.net/<container-name>/blob-name

You will likely notice during the VM provisioning stage a Storage Account will automatically be created for you and inside there a container created called "vhds" which should house all of your VM disks.