Pre-requisites:
x1 Windows Server 2008 R2 Machine (4GB RAM, 50GB Disk) for the inner server roles.
x1 Windows Server 2008 R2 Machine (4GB RAM, 50GB Disk) for the outer server roles (Edge)
Domain name with DNS control
>Firstly I created the new VM in the Developer Cloud section - a standard template of Windows 2008 R2 suffices for this need (along with >the default of 4GB of RAM) It is also important to make sure that we modify the firewall settings under the VM instance's "Network" tab >in order to make sure that we allow internal and external SMTP traffic:
tcp:25
We will also need to download Exchange Server 2013
SP1 (this is because earlier versions do not include the Edge Transport Server role - and actually required the 2010 Edge Server to function at the time!) Upon installing Exchange Server 2013 with just the Edge Transport server role we can now check that the services are running as expected within the Exchange Management Shell:
Test-ServiceHealth
and the required components are installed on the server:
Get-ServerComponentState
We will now need to register a domain name for our test instance and setup the MX and PTR records for the domain:
We will also need to setup a domain for internal use, since this is a test system we can install Exchange inner zones roles on the same VM (although this is not recommended by Microsoft and has specific drawbacks: http://technet.microsoft.com/en-us/library/ms.exch.setupreadiness.warninginstallexchangerolesondomaincontroller%28v=exchg.150%29.aspx )
Pre-requisites for DC (inner server) - which will act as the Mailbox and Client Access Server:
- Active Directory
- .NET Framework 4.5 (only if installing on Server 2008 R2)
- Windows Management Framework (WMF) 4.0
- Upgrade the AD schema
- Numerous windows features
- Windows Identity Foundation (Windows6.1-KB974405-x64.msu)
- Hotfix KB2619234 (437879_intl_x64_zip.exe)
- Microsoft Unified Communications Managed API 4.0 (UcmaRuntimeSetup.exe)
So if you are using 2008 R2 let's install the required features (using Add-WindowsFeature - as Google uses 2008 Datacentre - not R2!):
Add-WindowsFeature AS-HTTP-Activation, Desktop-Experience, RPC-over-HTTP-proxy, RSAT-Clustering, Web-Mgmt-Console, WAS-Process-Model, Web-Basic-Auth, Web-Client-Auth, Web-Digest-Auth, Web-Dir-Browsing, Web-Dyn-Compression, Web-Http-Errors, Web-Http-Logging, Web-Http-Redirect, Web-Http-Tracing, Web-ISAPI-Ext, Web-ISAPI-Filter, Web-Lgcy-Mgmt-Console, Web-Metabase, Web-Mgmt-Console, Web-Mgmt-Service, Web-Request-Monitor, Web-Server, Web-Stat-Compression, Web-Static-Content, Web-Windows-Auth, Web-WMI, RSAT-ADDS
Or if you are using 20012 let's install the required features: Install-WindowsFeature AS-HTTP-Activation, Desktop-Experience, NET-Framework-45-Features, RPC-over-HTTP-proxy, RSAT-Clustering, RSAT-Clustering-CmdInterface, Web-Mgmt-Console, WAS-Process-Model, Web-Asp-Net45, Web-Basic-Auth, Web-Client-Auth, Web-Digest-Auth, Web-Dir-Browsing, Web-Dyn-Compression, Web-Http-Errors, Web-Http-Logging, Web-Http-Redirect, Web-Http-Tracing, Web-ISAPI-Ext, Web-ISAPI-Filter, Web-Lgcy-Mgmt-Console, Web-Metabase, Web-Mgmt-Console, Web-Mgmt-Service, Web-Net-Ext45, Web-Request-Monitor, Web-Server, Web-Stat-Compression, Web-Static-Content, Web-Windows-Auth, Web-WMI, Windows-Identity-Foundation
So let us prepare the AD schema:
setup /PrepareSchema /IAcceptExchangeServerLicenseTerms
 setup /PrepareAD /OrganizationName: /IAcceptExchangeServerLicenseTerms
We can then proceed by launching setup.exe and following the wizard prompts. *We only want to install the Client Access and Mailbox Server on this VM*
Initially, we will have to add the inner Exchange server's certificate into the certificate store on client machines through AD / group policy - otherwise we will get a root trust warning like below:
setup /PrepareAD /OrganizationName: /IAcceptExchangeServerLicenseTerms
We can then proceed by launching setup.exe and following the wizard prompts. *We only want to install the Client Access and Mailbox Server on this VM*
Initially, we will have to add the inner Exchange server's certificate into the certificate store on client machines through AD / group policy - otherwise we will get a root trust warning like below:
 We also need to create a CNAME record on our local DNS server for the domain:
CNAME Alias: autodiscover.mydomain.internal
CNAME Target Host: exchange-gz.mydomain.internal
We also need to create a CNAME record on our local DNS server for the domain:
CNAME Alias: autodiscover.mydomain.internal
CNAME Target Host: exchange-gz.mydomain.internal
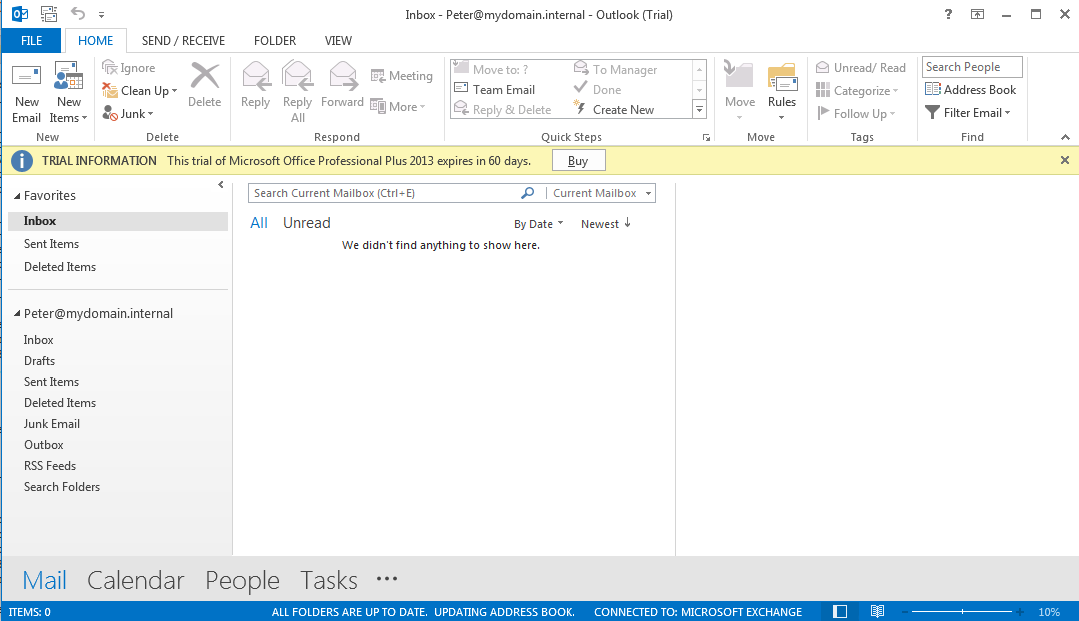
 We can now create a new user via the exchange web admin portal and then add a client workstation onto the domain, install Outlook 2010 / 2013, login with an AD user that has an assoiciated Exchange mailbox and launch the Outlook 2013 first run / mailbox setup wizard and your settings should be auto-detected my Outlook.
 Now we can deploy the VM for our Edge Transport role - as above we will install the same list of features and roles.
We must also make sure (as this will NOT be joined to the domain) that we have added a DNS suffix of the domain name we are using - in my case edge-server.mydomain.internal
When the installation has finished we can check the services are running correctly:
> test-servicehealth
Now in order to hook up the GZ and DMZ services we will use a mechanism called EdgeSync which allows the Edge Server in the DMZ to access AD data from the GZ without being joined to the domain! Although in order for this to work you MUST have AD LDS (Light Directory Services) configured on the DMZ server!
We will firstly export a EdgeSync configruation to import onto the GZ server - this is done on the DMZ server as follows:
New-EdgeSubscription –FileName "C:\subscription.xml"
We must also add an A record to Active Directory for the DMZ server.
And finally import the edge subscription key into the GZ server:
New-EdgeSubscription -FileData ([byte[]]$(Get-Content -Path "subscription.xml" -Encoding Byte -ReadCount 0)) -Site "Default-first-site-name"
Because we installed the Mailbox Server and Client Acces Role on the same server we need to configure port 2525 using:
Set-SendConnector "EdgeSync – Inbound to Default-First*" -Port 2525
and now we start the EdgeSync!:
Start-EdgeSynchronization -Server EXCHANGE-GZ.MYDOMAIN.INTERNAL -TargetServer EDGE-SERVER.MYDOMAIN.INTERNAL -ForceFullSync
We can now attempt to send a message using telnet to the Edge Server, although firstly we must make sure the DNS is setup correctly - see the following post for more information:
http://blog.manton.im/2015/01/451-440-dns-query-failed-error-was-dns.html
So let us Telnet into the SMTP service on the edge server:
telnet 25
HELO gmail.com
MAIL FROM: [email protected]
MAIL TO: [email protected]
DATA
.
You should get a return code of 250 and some kind of success message.
We can now check the mail queue on the Edge Server to make sure that it has gone through OK and finally check the clients inbox - although the message will quite possibly end up in the Junk Mail folder - since the reverse DNS check would have been invalid on the sender.
Now we also want external entities to send mail to our users on the domain, so for this we will setup address mapping and an addressing policy from the Mail Flow tab - since our internal domain and the external will be different. We can then verify that the users have the an email alias of the external domain under the user information: "Email Addresses" tab and if so we can send an email to this address from an external email provider to test.
We also need to configure a domain name, assign an MX record(s) and also create an SPF record to specify which mail servers are allowed to send email from the domain.
QUESTION: HOW TO SETUP EMAIL< SO EXTERNAL DOMAIN IS DIFFERENT TO THAN INTERNAL DOMAIN! VIRTUAL ALIAS MAPPING
http://www.exchangelog.info/2007/05/ports-that-need-to-be-open-on-firewall.html
http://www.mustbegeek.com/configure-external-and-internal-url-in-exchange-2013/
Now we can deploy the VM for our Edge Transport role - as above we will install the same list of features and roles.
We must also make sure (as this will NOT be joined to the domain) that we have added a DNS suffix of the domain name we are using - in my case edge-server.mydomain.internal
When the installation has finished we can check the services are running correctly:
> test-servicehealth
Now in order to hook up the GZ and DMZ services we will use a mechanism called EdgeSync which allows the Edge Server in the DMZ to access AD data from the GZ without being joined to the domain! Although in order for this to work you MUST have AD LDS (Light Directory Services) configured on the DMZ server!
We will firstly export a EdgeSync configruation to import onto the GZ server - this is done on the DMZ server as follows:
New-EdgeSubscription –FileName "C:\subscription.xml"
We must also add an A record to Active Directory for the DMZ server.
And finally import the edge subscription key into the GZ server:
New-EdgeSubscription -FileData ([byte[]]$(Get-Content -Path "subscription.xml" -Encoding Byte -ReadCount 0)) -Site "Default-first-site-name"
Because we installed the Mailbox Server and Client Acces Role on the same server we need to configure port 2525 using:
Set-SendConnector "EdgeSync – Inbound to Default-First*" -Port 2525
and now we start the EdgeSync!:
Start-EdgeSynchronization -Server EXCHANGE-GZ.MYDOMAIN.INTERNAL -TargetServer EDGE-SERVER.MYDOMAIN.INTERNAL -ForceFullSync
We can now attempt to send a message using telnet to the Edge Server, although firstly we must make sure the DNS is setup correctly - see the following post for more information:
http://blog.manton.im/2015/01/451-440-dns-query-failed-error-was-dns.html
So let us Telnet into the SMTP service on the edge server:
telnet 25
HELO gmail.com
MAIL FROM: [email protected]
MAIL TO: [email protected]
DATA
.
You should get a return code of 250 and some kind of success message.
We can now check the mail queue on the Edge Server to make sure that it has gone through OK and finally check the clients inbox - although the message will quite possibly end up in the Junk Mail folder - since the reverse DNS check would have been invalid on the sender.
Now we also want external entities to send mail to our users on the domain, so for this we will setup address mapping and an addressing policy from the Mail Flow tab - since our internal domain and the external will be different. We can then verify that the users have the an email alias of the external domain under the user information: "Email Addresses" tab and if so we can send an email to this address from an external email provider to test.
We also need to configure a domain name, assign an MX record(s) and also create an SPF record to specify which mail servers are allowed to send email from the domain.
QUESTION: HOW TO SETUP EMAIL< SO EXTERNAL DOMAIN IS DIFFERENT TO THAN INTERNAL DOMAIN! VIRTUAL ALIAS MAPPING
http://www.exchangelog.info/2007/05/ports-that-need-to-be-open-on-firewall.html
http://www.mustbegeek.com/configure-external-and-internal-url-in-exchange-2013/

 setup /PrepareAD /OrganizationName:
 We also need to create a CNAME record on our local DNS server for the domain:
CNAME Alias: autodiscover.mydomain.internal
CNAME Target Host: exchange-gz.mydomain.internal
We also need to create a CNAME record on our local DNS server for the domain:
CNAME Alias: autodiscover.mydomain.internal
CNAME Target Host: exchange-gz.mydomain.internal
 We can now create a new user via the exchange web admin portal and then add a client workstation onto the domain, install Outlook 2010 / 2013, login with an AD user that has an assoiciated Exchange mailbox and launch the Outlook 2013 first run / mailbox setup wizard and your settings should be auto-detected my Outlook.
 Now we can deploy the VM for our Edge Transport role - as above we will install the same list of features and roles.
We must also make sure (as this will NOT be joined to the domain) that we have added a DNS suffix of the domain name we are using - in my case edge-server.mydomain.internal
When the installation has finished we can check the services are running correctly:
> test-servicehealth
Now in order to hook up the GZ and DMZ services we will use a mechanism called EdgeSync which allows the Edge Server in the DMZ to access AD data from the GZ without being joined to the domain! Although in order for this to work you MUST have AD LDS (Light Directory Services) configured on the DMZ server!
We will firstly export a EdgeSync configruation to import onto the GZ server - this is done on the DMZ server as follows:
New-EdgeSubscription –FileName "C:\subscription.xml"
We must also add an A record to Active Directory for the DMZ server.
And finally import the edge subscription key into the GZ server:
New-EdgeSubscription -FileData ([byte[]]$(Get-Content -Path "subscription.xml" -Encoding Byte -ReadCount 0)) -Site "Default-first-site-name"
Because we installed the Mailbox Server and Client Acces Role on the same server we need to configure port 2525 using:
Set-SendConnector "EdgeSync – Inbound to Default-First*" -Port 2525
and now we start the EdgeSync!:
Start-EdgeSynchronization -Server EXCHANGE-GZ.MYDOMAIN.INTERNAL -TargetServer EDGE-SERVER.MYDOMAIN.INTERNAL -ForceFullSync
We can now attempt to send a message using telnet to the Edge Server, although firstly we must make sure the DNS is setup correctly - see the following post for more information:
http://blog.manton.im/2015/01/451-440-dns-query-failed-error-was-dns.html
So let us Telnet into the SMTP service on the edge server:
telnet
Now we can deploy the VM for our Edge Transport role - as above we will install the same list of features and roles.
We must also make sure (as this will NOT be joined to the domain) that we have added a DNS suffix of the domain name we are using - in my case edge-server.mydomain.internal
When the installation has finished we can check the services are running correctly:
> test-servicehealth
Now in order to hook up the GZ and DMZ services we will use a mechanism called EdgeSync which allows the Edge Server in the DMZ to access AD data from the GZ without being joined to the domain! Although in order for this to work you MUST have AD LDS (Light Directory Services) configured on the DMZ server!
We will firstly export a EdgeSync configruation to import onto the GZ server - this is done on the DMZ server as follows:
New-EdgeSubscription –FileName "C:\subscription.xml"
We must also add an A record to Active Directory for the DMZ server.
And finally import the edge subscription key into the GZ server:
New-EdgeSubscription -FileData ([byte[]]$(Get-Content -Path "subscription.xml" -Encoding Byte -ReadCount 0)) -Site "Default-first-site-name"
Because we installed the Mailbox Server and Client Acces Role on the same server we need to configure port 2525 using:
Set-SendConnector "EdgeSync – Inbound to Default-First*" -Port 2525
and now we start the EdgeSync!:
Start-EdgeSynchronization -Server EXCHANGE-GZ.MYDOMAIN.INTERNAL -TargetServer EDGE-SERVER.MYDOMAIN.INTERNAL -ForceFullSync
We can now attempt to send a message using telnet to the Edge Server, although firstly we must make sure the DNS is setup correctly - see the following post for more information:
http://blog.manton.im/2015/01/451-440-dns-query-failed-error-was-dns.html
So let us Telnet into the SMTP service on the edge server:
telnet
0 comments:
Post a Comment